


Today I will be showing you how to do Spirelli or 'string art'.
For some of you this may be a new technique and for some, just a reminder of a technique we sometimes forget to use. This is such an easy technique allowing you to make various designs to work with your project.
The first thing you need is your template. This can be cut with any cutting machine, manual or electric. What also works well are Nestibilities. Don't forget to do a search online for free templates.
For my sample I used a pattern from one of my Nestibilities.
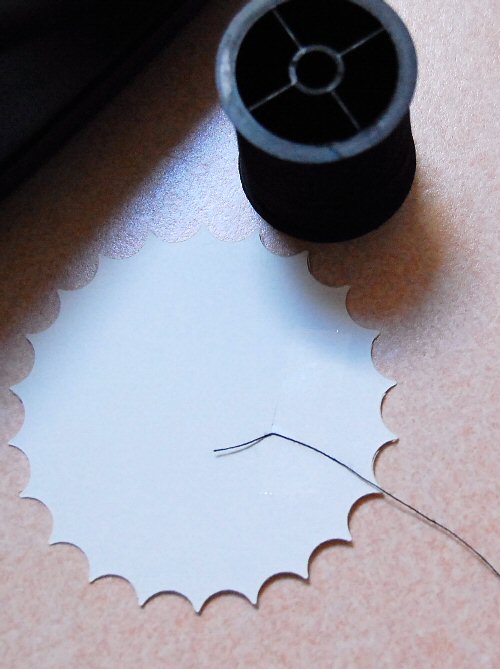

As you can see from the photo, you start by bringing the string to the front and depending on your design, bring it down and then under the cardstock from your point B. Bring it up so you start again at the next groove to the starting point. Bring that down to your new 'B' and go under and keep going. You will notice the string crosses over.

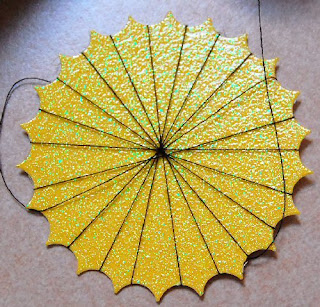
When I do my design, I keep going until there are'diamond' shapes for each groove. This also helps me keep track should I get distracted.
Depending where you bring your part A to meet part B will determine how much space you have in the middle. By bringing the string from A to B close, you will have more space in the middle to add whatever you would like.
Here is a simple design where you put the string through each groove, still using the cross over from A to B. How fun this would be for flowers by just adding stems or lollypops!!
Here is a simple design where you put the string through each groove, still using the cross over from A to B. How fun this would be for flowers by just adding stems or lollypops!!


Here is a different edged shape.
Here are two cards I made using a cut from my Lacy Labels cartridge. By changing the size on my Design Studio, I was able to get an oval shape.

Using the original shape, a circle, I designed this to have a larger opening.

I would like for you to notice that I cut little slits on this template to hold the string. This allowed me to use this super cool cut and not have my string move on me.
Remember to use tape to hold your finished end string to the back of the card.
I sure hope my instructions were easy enough to follow, and please, if you have any questions let me know. I would love to see your 'spirelli' on our Wednesday HoneyBee Showcase!!


5 comments:
SO fabulous Roe!!! :)
This is so pretty, Roe! I didn't realize there were so many different patterns! LOVE the finished Thank You card!!! Great tutorial :)
I love it ROE!!
Roe, your thank you card is GORGEOUS!!! Your tutorial is inspiring. I'm off to give this a try :)
I remember doing this as a child - thanks for the reminder! Will give it a try
Post a Comment