Sunday, October 31, 2010

Halloween Wedding for Rosemary's Son!

Yes, the long awaited day has come! Elizabeth and Joey are getting married today!!
Congratulations to Rosemary and Joe, too... the very proud parents. All of the HoneyBees are very happy for everyone :)
Roe and Elizabether were kind enough to share with us some of the spook-tacular things they have been making for this wedding.... though Elizabeth held some back to share with us next week, so she could hold that "WOW" factor even for Roe!
May their most unusual, and charming wedding always lead toward "Happily Ever After"!
~~~~~ ^ _ ^ ~~~~~
Hi and HAPPY HALLOWEEN!! I wanted to share with you a little of what is happening today! My son Joey is getting married!!! Now we know how fun Halloween is, but having a wedding today is going to be super fun. Elizabeth, my soon to be daughter-in-law, wanted a formal wedding with just a touch of Halloween thrown in. My son, who loves horror movies and the macabre, found the perfect mate who was just as thrilled to make this the day of their wedding!

I was excited when Elizabeth asked me to help with some of those touches that brings this wedding a little on the outside of norm.

First was 'Save The Date'. Putting their photo on a post card, and using the right fonts, set the theme in motion. Sorry, I don't remember the fonts that were used. Elizabeth added ribbon, flower and button and mailed these in clear A2 envelopes.


Next came the invitations! Using black Core'dinations with a terra cotta color background, Elizabeth had a clear vision of what she wanted to send out. A Martha Steward ribbon punch was used as a slider; (too bad the spiderweb wasn't out in the stores at the time this was done); I still love how the invite looks! The photo mat was cut using A Child's Year, and the spiderweb from Paper Doll Dress Up, with the Cricut. The RSVP card was hand stamped.


Elizabeth was so clever to come up with this idea for the seating chart...Black branches with tombstones hanging down!! Once the table has been assigned, she will then put the table number with the name.


Here are some fun 'candy' bags the guests will receive.


She has done more, but wants me to be surprised. I know haystacks and pumpkins will be used, and the flower girls will carry fall baskets with real leaves. Yes, this is an outside wedding and it's going to be beautiful!

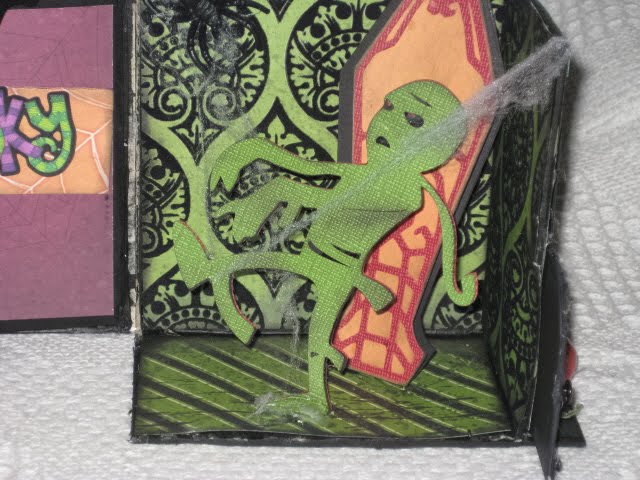
I was able to get a photo of the cake topper. Now, you have to understand this IS Halloween and this is something that shows the kind of humor Joey and Elizabeth are incorporating into their wedding.
~~~~~ ^ _ ^ ~~~~~
And the Mother of the Groom will be dancing with her son to the hauntingly beautiful Lullaby from 'Rosemary's Baby'! Now, isn't that sweet?!!! But, of course!
All the best to the happy couple! You can leave them a message of love and cheer here in the comment section! (And be sure to come back next week to see what other surprises Elizabeth has up her sleeve (or will it be under her hat???) Who knows?
We hope you have enjoyed our EEK WEEK presentations, and invite you to be here on Monday morning for our first regular TUTORIAL!! We'll be ready to introduce our new line up, and let you know how our weeks will be going,,,, plus the blog candy we've been promising is here, and ready for you!! And, I've seen our new blog design (draft) and I'm loving it! I don't know if it'll be quite ready for the unveiling on Monday, but VERY soon!
Happy Halloween! Have a safe and fun Trick-or-Treat :)
Happy creating ~
BettyBee and the HoneyBees!

Saturday, October 30, 2010

Give Me Something Good To Eat... Pumpkins and Haunted Houses! OH, MY!

I can't believe how quickly this week has gone by....only one more day before the big Halloween events take place! Here are some very cool treats for you today!
~~~~~ ^ _ ^ ~~~~~

Trick or Treat, smell my feet, give me something good to eat....
How many of you remember singing this as a child? Are kids still singing this or am I showing my age?!!..lol

Today I would like to share with you a treat I made that you are all familiar with, Rice Krispies Treats. Rather than cutting them into squares, I made balls to fit into cupcake cups. I wanted to play with my Cupcake Wrapper cartridge and thought this would be perfect time to try the 'witches' cut. I set the size at 2 and it was perfect for the standard size cup. I was able to get 4 cuts on one 12 x 12 sheet of card stock. The first 3 were in a row going down, then I reset the paper so the part that was not cut was now my cutting area. Not sure why, but I had a problem telling my Cricut to cut more than one at a time. No problem. I would do a cut and remove it so then I could see where to set my blade for the next cut. Then it was just a matter of hitting Repeat Last to cut another wrapper. When you set your card stock to cut in the area not used, just insert the mat without moving the blade. It's a close cut to where a previous cut was, but it does come out perfect.
This has got to be my favorite creepy spider!!.You will find him using October 31st

~~~~~ ^ _ ^ ~~~~~
Court Lee

Hello! I am so excited to be a member of the hive!

Today I am sharing with you these cute paper pumpkins.

I got the idea from Linda and told Betty about it. Betty made some two years ago for Halloween here and now I am making them! :)


Recipe:
Embossing: Cuttlebug™ Oh My Crafts Exclusive Everyday Bundle: Checkerboard ™, Swiss Dots™
Ribbon from my stash - recycled from wedding gifts received over 2 years ago! haha

Instructions:

Small Pumpkin
  1. Cut 12 6"x1" strips of paper (In my case 2 designs of 6 strips)
  2. Use Crop-a-Dile™ to punch 1/8" holes about a quarter inch from each end of the strips. I just put them in a pile and made one cut of each stack.
  3. Link 3" of string between two brads. Put the brads through the holes with the top of the brad on the wrong side of the paper. Spread the prongs on the right side of the paper.
  4. Starting from the bottom piece of paper, spread them around to form the pumpkin.
  5. I free-hand cut a stem on the pumpkin and adhered it to the pumpkin with hot glue. I did the same with the ribbon.

Bigger Pumpkin
Do the same thing as above except cut 18 strips at 9"x7/8".

~~~~~ ^ _ ^ ~~~~~


This post is going to be a little "photo heavy", but oh, so worth it! Welcome to my Haunted House Photo Album!! Thanks to Kathy from Paper Phenomenon for the house and the awesome U Stream class on how to create such a super-fun, interactive project!


The house is paper mache' and comes from Hobby Lobby. She shows in her FREE class how to cut the house so it opens up to reveal the room and album inside. The roof is made to come off already!
She used great pieces like the wooden fence, plastic skeletons from the dollar store, and pumpkins, and all sorts of miniature goodies for decorating her house! Then you add the creative cuts from the Cricut and the new Halloween cartridges, and you've got a real winner!


The two sides of the house swing open, and everyone has a zombie, Frankenstein and a skeleton in their living room.... not to mention the cool coffin in the corner! Well, don't you?

Against the back wall you see the interactive photo album! Now, if you were at the Cricut Circle Swarm in Salt Lake City, and happened to swap Halloween treats with me, you just might see your work in here! Look carefully...

These pages all have pockets with tabs that hold photos and journaling spots, so you can preserve your Halloween memories here for years to come! This is bound to delight and fright young and old alike.

See, here's grandpa's portrait hanging on the wall!


Time to shut these guys back in their coffins and lock up the mansion for the night... I think I see a witchy moon a' rising!


When witches are flying,
and Spiders are seen,
the Moon laughs and comes out
'cause it's Halloween!
Thanks for being with us again today, and we invite you to come back often, and bring your friends! There's a lot of sweet stuff coming up here in the Hive!
Blog Candy coming tomorrow!!!
Happy creating ~
BettyBee and the HoneyBees

Friday, October 29, 2010

Halloween Digital and Tole Painting Delights

Thanks for joining us for Day 5 of EEK WEEK here on our new blog, as we are presenting a lot of our favorite Halloween projects and ideas, while we are getting the Hive ready for our regular fun and games that will begin next week.

Here is a plaque I made for my kitchen, inspired by this poem that I saw on the internet somewhere. If you can help me identify the author, please do, so I can give credit where it is due! The photo is a little fuzzy here, so I'll read it to you... "Witches Brew" "I'm making a special stew. I'm brewing it just for you. What's in it you ask? I'll give you a clue. It's not a what, it's a who!" All of the elements are cut from Oct. 31st and Paper Doll Dress Up Cricut Cartridges. They are colored with Copics or watercolor pencils, and accented with Stickles. So much fun!

Below you are going to be treated to some truly fun tole painting pieces by Wanda, and it brought back such great memories, as she and I have painted together for many years. Tonight I came across thie cute little candy corn family that I did a couple of years ago. I even painted the eye lids on their wiggle eyes! Simple, but cute in the right spot!

~~~~~ ^ _ ^ ~~~~~


It's Day 5 of our EEK WEEK! Hope you all are getting around our hive and making yourselves comfy!

I wanted to share with you a project I made for Halloween this year and some of my favorite projects I've done in the past!
First off, lets start with the new


This little gal I called Witche Pu. She's from a Tole Painting book I have. I traced her out on tracing paper and then stuck it on my copier. Sized her down and printed her out. I made 3 layers and popped dotted each one together after coloring her with Bic pens.


Her eyes and tooth are acrylic paint. The wonderful bubbles are Stickles. I used 4 different colors to give it dimension and zest.

I glued her to a paper bag and made her into a luminarie. Do you think she'll scare away the trick or treaters?

Next, I will show you some of the Tole painting items I've done over the years. Ummm, lets just say this is only a few of them. I love Halloween and I have approximately 13 large containers of decorations. LOL


Dancing Mr. Bones hangs on my front door and entertains you while you wait for me to answer


Freida sits on the front steps and is fixin' our dinner


Oops! the moon wasn't out last night and look what I found on my light post!

I think she should have had this information ahead of time. (What do you think?)

Zelda is all ready to go out trick-or-treating!
Hope you enjoyed my little collection. I'm off to scare the goblins away!

~~~~~^ _ ^ ~~~~~


Recently, I had the opportunity to play with a new digital software program called My Memories Suite 2. Though I love my papers, ribbons, flowers and everything you can think of for a layout page, I also enjoy playing around with digital and incorporating digital to make a hybrid layout. Here is a digital layout I did using a free Halloween kit called 'All Hallow Eve' by Twinky. The Word Art and frame are part of the download program. This is a photo of Elizabeth and Joey picking pumpkins for their upcoming wedding!

~~~~~ ^ _ ^ ~~~~~
OK, I'm off to fix some Spook-ghetti and Yummy Mummy Fingers! What are you fixing for Ghostie Grub? How about some Rice Creepies, or some Boo-Berry Pie? Of course, there is always Death by Chocolate! Bwahahahahaha!!
Bone Appetit! Eat, Drink and be Scary!
We'll be back tomorrow with some more fun and frivolity:)
PS. Don't forget to pop back to yesterday's post and show us what costumes you are making this year!! We want to see what everyone else is doing!
Happy creating ~
BettyBee and the HoneyBees

Wednesday, October 27, 2010

Got my Witch's Broom out...

and chased away those Blogger Gremlins! Sorry about the problems with getting our post up, and being able to add these things to the bottom of Rosemary's creep-ative idea for using up some creepy old cardstock into a Be-Witching BOO banner!
~~~~~ ^ _ ^ ~~~~~

Now you know I really am totally "Batty", and I've brought you another cute bat idea!! How about a hair clip or pin for your favorite ghoul when she wants to have fun???


Step one is to take a simple bat pattern, and this is the same one I've used on the banner, and my Dollar Store altered headband above. Cut out two layers of felt.


OK, Blogger, you win! This picture is going to be sideways... the Gremlins are still here :o>

This is my Imaginisce I-TOP, and it is an extremely cool tool! It creates custom covered brads, magnets, and even screw on hair clips! Be sure to check out their website... because the I-Rock comes from them, too! Anyway, back to the tutorial.... lay a piece of felt over the brad top, and give it a squeeze, then add the brad base, another squeeze, and you've got it!


Step three was to use the I-Rock heat setting tool to add a couple of spooky eyes to the brad. The gems that I have are pink, but a quick touch with a permanent marker instantly made them red.


(Another TRICK-or-treat from Blogger!) Here is the backside of the bat, with the brad inserted. It pushed through quite easily.


Step four was to add a few hand stitches for accent then use Beacon's 3-in-1 adhesive to glue the back felt to the front. This gives it a little more stability, and covers the brad backing.


Last, but not least, wrap a piece of grosgrain ribbon around the hair clip, so it will hold securely in even the whispiest hair, and glue to the back. Fang-tastic!


How about a couple of legs instead of wings, and a pin back? Super easy, and so Squeamish!

We have some more devilishly delightful ideas for you throughout the week! I am working on the sidebars, LINKZ and other goodies for you, as Wendy is working on the HIVE and the other morsels for the HoneyBees. We thank you for coming to check us out, and hope you will come back often, and invite your friends, too. I'm brewing up a great batch of blog candy for TRICK-or-TREAT, so you don't want to miss it!! I'll be checking to see who has been here, and who has left us a comment or two.... bwahahahahahaha!!!

Happy creating ~
BettyBee and the HoneyBees

The Week of 'BOOs'

I hope you are enjoying these charmingly creepy projects this week! Here is another of our HoneyBees with a fun banner for welcoming the little ghosts and goblins to your haunted mansion!
~~~~~ ^ _ ^ ~~~~~

You can never have enough 'BOOs' during the Halloween season!! Considering the busy week I am having, it was easier to make this cute little BOO wall hang than to bring out my boxes of Halloween decorations. Not having any chipboard, I used those card stocks that we all have in our stash that we just had to have two years ago, but never used. By using my Base Camp cartridge, it was easy enough to cut 4 of each letter at 3 1/2 inches with my Cricut machine. The 5th cut was the Halloween card stock I wanted to use for my project. I love my Crop-A-Dial! How easy it was to punch holes for my black ribbon, 'tieing' it all together. The spiderweb and spider were cut with my Cricut October 31st cartridge, ghosts were done with a Sizzix die then chalked with gray and the bats from my Martha Stewart punch. Red Smooch was used for the bats eyes and orange for the spider. Black fringed yarn was then wrapped around to give it more dimension.

~~~~~ ^ _ ^ ~~~~~
Well, by now I know you must have figured out that I am a little "batty" and I have another bat tutorial for you! However, Blogger is being haunted by gremlins tonight, and refuses to let me upload any more photos! B-O-O!!! So, I will wait and do another post for you later in the day :)
Hahahaha, Blogger, we will be Treated, Not Tricked!
Until later!
Happy creating ~
BettyBee and the HoneyBees