Monday, November 29, 2010

Monday Motivation - Fred She Said

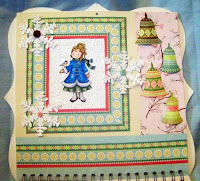
Emma the Caroler / Caroling Angel


Good Morning! It's Motivational Monday. I'm so excited to be able to bring to you
I have been a fan of hers forever! At Fred She Said there are a variety of Digi's at your fingertips,
from Darling Children to Beautiful Flowers and everything inbetween.
I'll give you a heads up... this week, on Wednesday, we are having a Challenge featuring Fred She Said images. Don't have any you say?... Don't fret! You can go to her website and pick something out. There is even a Freebie section. You will have a hard time deciding though:) Well at least I do. (I do believe I own almost everything she's ever put out.) There are only a couple I still need to get. LOL
Here are a few of her terrific Digi's that I've used over the last year.
Doodle Dallion
This dimensional decorator piece is layered, pierced and paper pieced.
Tea Cup Pansies
This beauty comes pre-colored, and is layered with dimensionals.
Emma & the Chickadee


Catching Snowflakes

Poinsettia
Coloured Decoupage Blossoms

Purple Pansies Set

Coloured Decoupage Blossoms
These beautiful blossoms are cut and layered, with the tips rolled to give such realistic shapes. Adding Stickles or Flower Soft to the centers adds to the true beauty of these pre-colored favorites.


Butterflies Doodle Dallion

Hope this motivates you all to get buzzing. I can't wait to see what you create!
Huggles, Wanda

*************************************************************
We are so very grateful to Fred, from Fred She Said, for sponsoring us this week, and hope that you will visit their website and blog. Come join us for the Challenge and HoneyBee Showcase on Wednesday, and you could win a wonderful Gift Certificate! Plus you will be in the running for our December Blog Candy, too! Every comment and post you leave from Nov. 15 through Dec. 15 goes in the drawing for the blog candy :) Good luck!

Photobucketand the HoneyBees

Friday, November 26, 2010

Buzz, Brag & Bee Happy Friday 11/26

Hello again, on this fabulous Friday (after Thanksgiving here in the USA!) I know many of us have been up all hours shopping for those great bargains on Black Friday super sales. I have been on the phone with my daughter in PA, as well as texting with a couple of our HoneyBees, as we've been scouring the stores for those extra special gifts for our loved ones! Did you go out? Did you shop on-line? Are you finished your Holiday shopping? What was your best deal?


On Monday I posted the Monday Motivational from a very unusual place (my hospital bed!) and was unable to bring you the pieces that I wanted to do... and I want to publicly thank the HoneyBees for stepping up and doing a wonderful job in my absence. Thank you all for your prayers and concern. My doctors are working hard to figure it all out, and I have much to be grateful for. I am beginning to feel better. I'll keep you posted :)

Here is one of the pieces I was working on for you.


This plaque is from Michael's, and is 6 x 24. I painted the board with acrylic paints, and then added the lettering and Cricut cutouts.


Santa is cut from the Chritsmas Noel cartridge, and I colored his face with Copics. His hat brim and ball are done with Sparkle N Sprinkle's "Sparkle Soft" flocking with glitter in it, which was applied with their Dimensional Glue.... this stuff is great, because it holds it's shape. The beard is also the Dimensional Glue, but the flocking is plain white, without glitter. The holly cuts are from Joys of the Season.

Around our house, when you stop believing in Santa Claus, he stops coming...

so everyone always believes!
**************************


I am very excited to share some news that I've been sitting on! On Sunday the Special Holiday Sampler Edition of SNR Magazine debuts, and my JOY candle has been chosen to be featured! I do hope you will check out this wonderful online collection of fabulous holiday cards, layouts, home decor ideas, and all kinds of fantastic projects!

**************************************


I had a couple of November birthdays to remember, so I made this card using my BasicGrey Nook & Pantry 6x6 papers and coordinating acrylic stamp set. The inks are by CTMH, the ribbon from my stash, and the white gel pen (faux stitching) is Signo Uni-ball.
Hi, I am HoneyBee June Houck. I made a second card from the scraps in my BG 6x6 pad. I love to use up scraps :)
Do you use your scraps or toss them? How do you use your scraps? I hope you leave a comment and share...until then, have a scrap-tastic weekend!


************************


It was such a busy week that I didn't get to do the layouts I wanted to get done for today. So, what I would like to do is show you a couple of the photos that I printed and will use on a layout. Of course, this give me a chance to brag a little about those in the photos...:)


This is my beautiful granddaughter, Nina. She made a comment that she is 'always a flower girl' so we told her she was a junior bridesmaid. This photo is from Joey and Elizabeth's wedding.


This is my cutie pie grandson, Ian. He was so proud and took his job carrying the rings very seriously. Don't you just love that pillow?!


My two handsome sons!..Jeff, on the left, is dad to Nina and Ian and was best man for Joey. For those that don't know, Joey and Elizabeth were married on October 31.


We would love to hear what you would like to brag about! Leave comments and photos :)

******************


Beth Ullman

Good morning to all our readers! I haven't had time to do much crafting this week...... but I have some good news this week ... I make my Design Team debut on Whoopsi Daisy's team on Sunday! I am so excited, because I just love Linnies digi's.

Hope everyone in the USA had a fab Thanksgiving. I know one thing, my bunch sure did stuff themselves. No shopping for me today, but I did do some shopping over at StampingScrapping last night. Cindy is having a wonderful Black Friday Sale.

I have one picture to share today. These are my girls (daughter and 2 granddaughters) and I think they are just beautiful.


Hugs, Beth

******************************

Don't forget to stop back for Monday Motivation and see what our HoneyBee has to share with us. We will have a sponsor and prize next week!!!

Please leave us a comment, we love hearing from our guests. Don't forget to upload pictures of your vinyl projects to our Wednesday HoneyBee Showcase page :) You have 30 days before the link closes. We WILL be having BLOG CANDY again :)

Photobucketand the HoneyBees


Wednesday, November 24, 2010

HoneyBee Showcase - Vinyl Projects

Welcome to our HoneyBee Showcase today! Here are our vinyl projects created by following the tutorial BettyBee gave us in our Monday Motivational...

This project was really fast!
I have cut vinyl once before, but it was a while ago, so I just followed Betty Bee's tutorial and voila! Easy peasy!
OUT FOR PUBLICATION!!! :)

Recipe:
Jars from Michaels
Cuttlebug
Cricut
Vinyl: EAD Designs™ (of course!)
Cartridges: Straight from the Nest™, Cake Basics™
Embossed felt from Michaels
Card Stock: Paper Trey Ink: Ripe Avocado and Spring Moss™
Embossing folder: Perfectly Paisley™
Scissors
Adhesive: Glue Arts Perma Tac™
Ribbon: Paper Trey Ink Perfect Match in Ripe Avocado -Saddle Stitch™

Pop on over to my blog for instructions. :)

*******************


For my project I made a Family Home Evening board. I placed the vinyl lettering on a metal sheet so that I could make indiviual names. The names are printed on paper and glued to the backs of clear pebbles. Then I glued magnets to the back of them.. It also a great idea for chore charts.

I can't wait to see what you create!
Huggles,
Wanda

************************


Betty, thank you for your easy-breezy tutorial. I have never worked with vinyl until now and I love it :)
After reading Betty's Monday Motivation tutorial, I headed for Michael's. I found this wood board ($5.99). The only Cricut Cuttables adhesive-backed 3 mil vinyl they had in stock was hot pink. I headed to JoAnn's, where they had every color available. I chose this chocolate brown vinyl ($9.99) and a crackle finish ($1.99). I painted my board with buttercrunch acrylic paint and sponged with antique white acrylic paint. I applied the crackle finish after the paint had dried, then distressed with chocolate chip ink by SU. I cut the letters and numbers on my cricut using the Plantin Schoolbook cartridge (3" for the name and 1" for the date.) I used painter's tape to remove the vinyl letters from the adhesive backing to keep them lined up. Great tip, Betty!
I am HoneyBee June Houck. Buzz over to your local craft or hardware store for this easy project...I think it makes a great gift!

************************


It was time for me to make a new wall plaque for my craft room and decided now would be the time and use the vinyl technique. I found a frame on sale at Michaels that I knew would work perfectly. The frame is a 10 x 13 so I had to think of how using my 12x12 paper would work. After covering the background with DCWV cardstock, I added a flower border to disguise the added cardstock.

Using Design Studio, I welded my letters from the Songbird cartridge and cut at 2 3/4 inches. Using painters type to transfer onto the glass worked really well. I just had to lift a small section of the first letter to get it started. Before I removed the tape, I used my fingers to make sure the vinyl had a good hold to the glass. The saying was done with the computer and popped on the glass.

Now it was time to add a pretty corner border. Keeping with my fun color scheme of pink and orange, my project was not completed.


************************


Hope everyone has checked out this week’s Monday Motivation. We are using our Cricut and vinyl today on our projects. I am a little new at the vinyl, but decided to make a plaque for my kitchen. I used the Cricut cartridges Lyrical Letters and George Basic Shape. The first thing I did was cover my plaque with Weathered Wood and Peeled Paint from Ranger then added the letters. Lastly, I glued on the wooden embellishments at the bottom.

That is it for me today. See you Friday for our weekly chit chat and I hope all of our USA friends have a fantastic Thanksgiving with your families. Please say a little prayer for our Queen Bee who is having some health problems right now.


Monday, November 22, 2010

Monday Motivation 11/22 Vinyl Lettering

Well, I must admit, this is not the post that I planned for today. I have a beautiful red holiday plaque planned to share with you.... but I am posting this from my hospital bed, and it is at home in StudioBee, so I hope you will be patient and wait for another day to see the other pieces I wanted to share. (I have had some unexpected tests come up, and hope to be home before Thanksgiving.) But, I still want to share the basics of vinyl lettering with you...

These wooden plaques are cut from poplar, sanded, painted, and sanded again. They make wonderful gifts, and are easy to personalize. The letters are cut from Plantain SchoolBook at 3.5 inches tall and the width varies depending on the length of the name. This was done on the Gypsy, or could be done on Design Studio. If you don't have either of these, you might need to adjust the spacing of your letters to fit the length of your board. "Est. and the year" are at one inch.

The most important thing is to adjust the blade depth of your Cricut, so it cuts only the vinyl, and not the backing sheet. (Mine is nearly always set at 2, but some thicker wallpaper vinyl has needed a 3.) This will allow you to maintain the proper spacing and alignment of your wording. After you cut your vinyl, remove everything that won't be placed on your project (this is called weeding). Now you will need to have a transfer material to move the vinyl from the backing sheet to the plaque, glass, wall, etc. I have found masking or painters tape to work very well. Just touch the tape to your clothes a couple of time to cut the tackiness, and it will be just fine. Cover the entire length of your project with tape, burnishing well. Lift and transfer to the desired location. Burnish again, so it will be stuck to the plaque, glass, wall, etc. and then remove the masking tape. Voila'!! Your project is complete!

There are different types of vinyl on the market, and they differ in thickness, as well as stickiness. Some are for outdoor use, and some are for indoor use only. I get a lot of vinyl from an automobile sign shop, so it is thin, and very sticky... and designed for outdoor use. It is color safe, and lasts a very long time. They are glad to sell me scraps. This thin material works well for car window designs, model radio controlled airplane logos, and other pieces that are exposed to sunlight and weather. Cricut and wallpaper vinyl are great for wall words.

If you have comments or questions, please leave them here, and we'll be happy to do our best to answer for you. The HoneyBees will be here on Wednesday with lots of examples of great vinyl projects to show you!

I'll be back soon....
Happy crafting ~

Photobucketand the HoneyBees

Friday, November 19, 2010

Buzz, Brag and Bee Happy Friday 11/19


Another weekend is here in the hive, and we hope you have had a delightfully creative week. This is the place to share what you have been doing, and what is good in your life! Let's see what the HoneyBees are sharing today!


At the SWARM last weekend, I was told I would have a project to do. I had no idea what that project was until this paper mache house was handed to me. Kristi and Betty painted the houses brown, so mine was done for me. Did you ever have one of those moments where you look at something and say 'what am I going to do with this?' Well, that's what happened to me. Betty and Kristi bought loads of decorative ornaments, but I still had no idea of where I was going with my project.

The roof was the problem. How do I cover this roof?? I used a Martha Stewart punch and made strips and more strips until every section was covered. Not an easy task. After choosing my paper, I found myself going into the gingerbread look, so that is what I ran with. Thanks to Betty, I have a fireplace!..Though I did mumble under my breath a few times, ok, maybe out loud too, I am please with the end result. I think we all need a challenge once in a while, and this was my challenge. Mission accomplished!!


BettyBeeAs Rosemary said, last weekend was a super time for several of the HoneyBees! We met together, with over 20 other ladies, to swarm (when Cricuts gather to crop, it's a swarm!) and our theme was "Angels Among Us". I wanted to share a couple of things that I made for my Swarm Sisters ...

I made these nametags for everyone there. I started with a Sizzix die cut angel, and designed an overskirt, which I embossed with the Lacy Christmas Tree Cuttlebug folder, and curved to give the angel a 3D shape. Each angel had her hair colored to match the hair of the recipient, and her name written on the wings.

Each person made a Christmas ornament to share with the others, and this is the one that I made. It is from last years' When It's Cold Outside Cricut Cartridge, which cuts very unique snowflakes. This one is all angels all around. I used a gold leaf pen to color their halos, and their wings are sparkled with Crystal Stickles.
I, too, finished one Christmas house, which was auctioned off, and the proceeds went to buy shoes for children in a Head Start class for Christmas. (I still have another house to finish. I hope to have it to share with you next week!)


Courtney Lee
Well, hello to all of you in bloggy world on this (finally) Friday!
I have to tell you that I am feeling SO good right now because I made top 3 at Digital Delights for this card:

I clicked over to the Delightful Challenges tab and there I was! :) Both Betty and Wanda are design team members for Delightful Challenges, as well as being Honey Bees, so I was playing to show my support for them and now I feel like I've "done them proud". :)


Thanks for letting me brag today. Let us know if you've won a challenge or even if you're just SO proud of a certain card or project you did. We would LOVE to see them! :)

*************************************************
Thanks for being with us, and now it's your turn to Brag on yourself! Share what you've been doing, and your GOOD NEWS! Leave comments by clicking on the "comment" word, or photos by clicking the blue LINKZ button below!

BettyBee and the HoneyBees

Wednesday, November 17, 2010

HoneyBee Showcase - Table Tent Cards and Blog Candy Winner

Happy Wednesday, one and all! I hope you have had fun with Rosemary's Monday Motivation tent card tutorial. The HoneyBees have created some really delightful pieces to share with you today. We hope you will make some, too, and link them to our LINKZ at the bottom of our post.


We also want to announce the winner of our very first BLOG CANDY! Congratulations to


AlienAnessa!!!


Send your address to BettyBeeDesigns@hotmail.com and I'll get your package to your right away. You have one week to respond, or we will have to choose a new winner. Congratulations, and thank you for all of your bee-autiful comments!! We really appreciate all of you!


******************************************
On to the Showcase of HoneyBee projects ............
****************************

I was so delighted with Rosemary's tutorial from Monday, because it worked like a dream with each set of my holiday dishes! Oh, what fun!!

BettyBee


This is my good china, and I made these Pilgrims from the Thanksgiving cartridge, the Victoria Cuttlebug folder, and the beautiful copper and gold leaves are also cut from a Cuttlebug die.

These are the dishes I use for the Christmas season. I just love the holidays, and a festive table every day really sets the mood for the whole family. This Jolly Santa is from a digital image that I have had for a long time, and I apologize for not knowing where to give credit. The Holly Leaves are from the Creative Memories Cheerful Seasons Cricut cartridge.


These are my party dishes! I love that they say Cheer, Joy, and Celebrate right on them! Again, I have carried the theme of the dishes to the napkin holder by heat embossing the snowflake die cuts (another Cuttlebug die) and the Reindeer from the Joys of the Season cartridge. I used the flip feature on my Expression to get it to face left, like the plate. Easy!
I hope you will take a look at your dishes, and see if you find inspiration there, too! Create your tent placecards and/or napkin holders, and link them to LINKZ at the bottom of this post for all of us to see!!
Photobucket

********************************

Roe, I loved your quick & easy tutorial. I made mine in less than 30 minutes! My mom is coming for dinner tomorrow and I thought this would be a nice surprise for her.
Hi, I am HoneyBee June Houck. I cut a decorative die using my Cricut and the French Manor cartridge with black card stock. My decorative paper and coordinating chipboard piece is from The Paper Company Studio Secret Garden collection. The decorative brad is from Hobby Lobby and the chipboard piece is mounted on Bazzill Bling die cut with a square Nestibilities and punched with an SU border punch. I am thinking of making one for dh to spruce up dinner tonight :)
******************************************

Beth Ullman

Good Morning I am here to share 2 projects today. The first being Rosemary's beautiful place card, and the second is one I did for my grandchildren....can't leave the little people out!


I used some beautiful leaf paper made by DCWV for my background. I then added those gold glittered leaves that I cut out using a Sizzix diecut. The pumpkin is a Cuttlebug cut and emboss set. I added some more darker leaves to help set it off.


Now this cute little fellow I found here on Qbee's Quest . Doesn't look quite as cute as Brenda's and I could not get my colors to show just right, but I know my grandson will think it is cool...... I hope you will show us your place cards, you know Thanksgiving is only a week away
*************************************
Courtney Lee

I found myself saying, "Thank you Roe for making my life so easy." out loud while I was doing this project. So THANKS ROE!
Anyway, here is my version of it. Jim is my dad so this will be his place-setting for Thanksgiving!

Recipe:
Paper: Imaginisce Apple Cider Line: Changing Leaves™
Card Stock: Paper Trey Ink Pure Poppy™
Stamp: Imaginisce Apple Cider Line: Snag 'em Ups: Frame™, Martha Stewart Alpha Stamps™
Cartridge: Thanksgiving™
Filigree Gold Heat Embossing Powder from Paper Trey Ink™
Heat tool by EK Success™
Glossy Accents™
Button Twine by Paper Trey Ink™
*************************


For my table tent, I wanted to make something special for each of my family. I used the cute little Turkey from Digital Delights. The paper is from DCWV. I colored little Tim with Bic markers. On the back is a circle that I will write a special message to everyone. Telling them what quality of theirs that I'm thankful for. Huggles everyone and have a fabulous week.
******************

Kristi Driscoll

These two little fellows are for two very special little men in my life, my two nephews. The downloadable image is from Digital Delights and was colored with Copics. The borders are a Martha Stewart punch, sparkled with Stickles. The design is finished with a strip border, threaded with a ribbon, and matching bow. Add a heart name tag.
**************************
Great ideas here, and we hope you are inspired to give our table decor project a try! Come back with a photo, and link it to LINKZ below. I know some of our readers are unsure how to do this, if they don't have a blog. The easy way is to upload your photo to your computer, and then to a free account at http://Photobucket.com When you upload your photos to photobucket, there is a URL assigned to the photo that will allow it to be posted on blogs and galleries. Very easy and free! We have also had the question asked about leaving comments, if you don't have a blog... that, too, is easy... open a free GMAIL account, if for nothing else than just so you can click the GOOGLE ACCOUNT dot, and you're in, without a lot of fuss! With some blogs you will still have to type the scrambled word to prove you're human, but that's a security thing to prevent scams. I hope this has been helpful. See you again on Friday with more Good News!

Photobucket and the HoneyBees