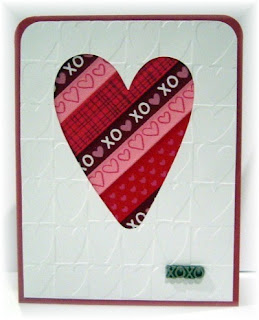
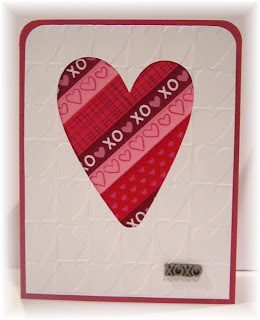
 Happy Monday! This week our HoneyBee inspiration for you is to use ribbons in creative ways. I had the idea for this card in my head, but I was not sure how it might evolve. I wanted to cut the heart out on my Cricut machine (though you could use a punch, die or cutting template.) I got my Cricut machine almost 3 months ago and I have had fun learning how to use it via both trial & error on my part and Betty Bee's sage advice! Are you ready to learn how to cut a Cricut aperture and/or make a quick and easy card?
What I learned about my cricut:
navigation keys- these are the directional buttons surrounding the CUT button on the cricut.
feature keys- multicut, center point, flip, line return, settings, mat size,...
To cut an aperture:
Use the navigation keys to place the blade at the center point of your image. After loading your paper and selecting your image (I used 3 1/4" heart from the Accent Essentials cartridge), press the CENTER POINT feature key and CUT.
Card directions:
1. Cut white card stock @ 4"x5 1/4". Cut aperture. Emboss as desired (I used Cuttlebug Heart Blocks embossing folder.)
2. Cut a 3 5/8" square and cut off one corner. Apply adhesive (I used my xyron.) Adhere a variety of ribbons. The back will look like this if you want the ribbons to be diagonal:
 This is the front view:
 3. Trim off excess ribbon, if necessary:
 4. Position your ribbon panel (cut off corner at top), and cut off the two adjacent corners that are sticking out behind your white layer. Adhere behind the aperture. (I chose to use a corner rounder on the top corners to mimic the heart shape.)
5. Adhere to coordinating card stock (8 1/2" x 4 1/4"). (Round top corners, if desired.)
 I also added a metal charm from my stash. I think I will try this again; I like this idea for using up ribbon scraps or as a way to use neglected ribbons in my stash.
Please come back on Wednesday for our HoneyBee Showcase on other creative ways to use ribbon. We hope you will link your fun ribbon projects. If you have time to leave a comment, that would be really nice, too.

and the HoneyBees


 June Houck
5 comments:
June, I'm so happy to see you enjoy your cricut; I would be lost without mine!..Love your card and I must give this a try..very clever and easy!
June!!! This is FABULOUS!!! Way to go and I LOVE that ribbon idea!
Love the card!
Thanks for the inspiration....I gave you a "Stylish Blogger Award" go to m blog http://scrapbookingbybethany.blogspot.com/ to pick it up.
very ARCTIC!
Thanks for the tutorial! I need to try this ribbon aperture.
Post a Comment